Furniture designers can be very creative when it comes to table legs. But for their tops there often isn’t anything beyond circles, rectangles or ellipsis… So I made my custom super-ellipsis table!
Finding the right shape
After we finished a bookshelf with Yoni from matab design, we mentionned that we were now looking for a dining table. He offered to design one with us.
We started thinking about the table’s shape. The dimensions we had in mind were 1.6 x 1.1 meters. We wanted something curvy. I didn’t like the solution Yoni usually goes for (below: a rectangle joining two half-disks) because it does not have a constant curvature. Ellipsis were also out, because sitting across their major axis is not comfortable. They are too “pointy”.

See the curvature discontinuity?
I remembered the “super-ellipsis”, a family of curves which work well as compromises between rectangles and circles. The name sounds exotic, but you’ve certainly seen this shape before: iOS icons are a type of super-ellipsis called “squircles”.
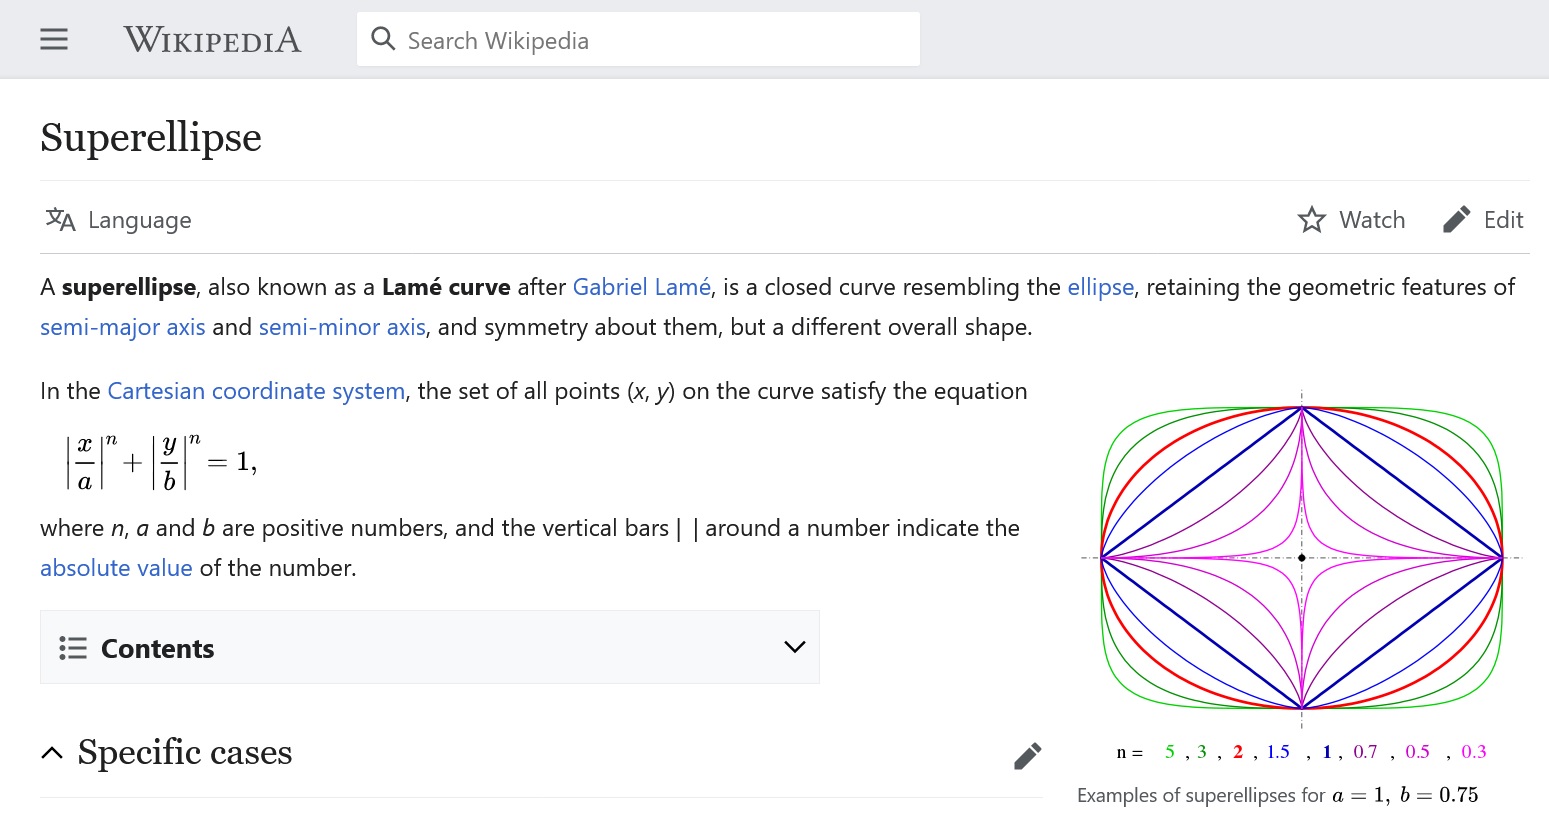
This is it 🎯.
In Stockholm, super-ellispis have been used by Piet Hein to design the Sergels torg roundabout (and turns out he and others fellow designers already created a line of tables..!).

Sergel Torg - Photo by JONATHAN NACKSTRAND/AFP via Getty Images
I called Yoni and asked him if had heard of those shapes. I told me he did not, but that if I could send him the right computer file he could CNC machine the slab of marble any way I wanted. Game on!
How to CNC-machine a super-ellipsis
Writing DXF files
👉 The code for this project is available here
All Computer Assisted Design software can exchange drawings using a format called DXF. It’s text based with all the kind of features you’d expect: drawing primitives (lines, splines, text…) with tons of attributes, layers… There is even a python package to read/write DXF files, ezdxf.
Getting started was really easy:
# pip install ezdxf[draw]
import ezdxf

# https://ezdxf.mozman.at/docs/usage_for_beginners.html#create-a-new-dxf-file
doc = ezdxf.new()
doc.saveas('my-shapes.dxf')
It’s simple to start drawing shapes like lines or splines:
msp = doc.modelspace()
msp.add_line((0, 0), (1, 0))

# https://ezdxf.readthedocs.io/en/stable/tutorials/spline.html
fit_points = [(0, 0, 0), (750, 500, 0), (1750, 500, 0), (2250, 1250, 0)]
spline = msp.add_spline(fit_points)
For some reason sketchUp wouldn’t open our DXF files, so we didn’t get accurate renders of the complete table… Anyway SolidWorks didn’t mind, so when it came time to cut the shape, everything went smoothly.
From there, all that was left was interpolating our super-ellipsis with smooth splines. While the super-ellipsis cartesian equation is not super easy to use,
Thanksfully the parametric version is well-known:
I wrote some code to sample points. With minor changes:
from ezdxf.math import Vec3

@dataclass
class SuperEllipsis():
  p: float
  a: float
  b: float

  def sample_t(self, t: float) -> Vec3:
    cos_t = np.cos(t)
    sin_t = np.sin(t)
    x = self.a * np.abs(cos_t)**(2/self.p) * np.sign(cos_t)
    y = self.b * np.abs(sin_t)**(2/self.p) * np.sign(sin_t)
    return Vec3(x, y, 0)

  def sample(self, n: int) -> Iterator[Vec3]:
    for i in range(n):
      t = i * 2*np.pi / n
      yield self.sample_t(t)
    yield self.sample_t(0) # close the loop
Now that we can sample points, we only need to stitch them together into a spline.
fit_points = list(ellipsis.sample(n))
spline = ezdxf.math.fit_points_to_cubic_bezier(fit_points)
spline = msp.add_spline(fit_points)
Et voilà! We can view the results in libreCAD - in red a standard ellipsis, in white our superellipsis with $p=2.5$, 1024 samples, using the correct $a$ and $b$ corresponding to the table’s size:
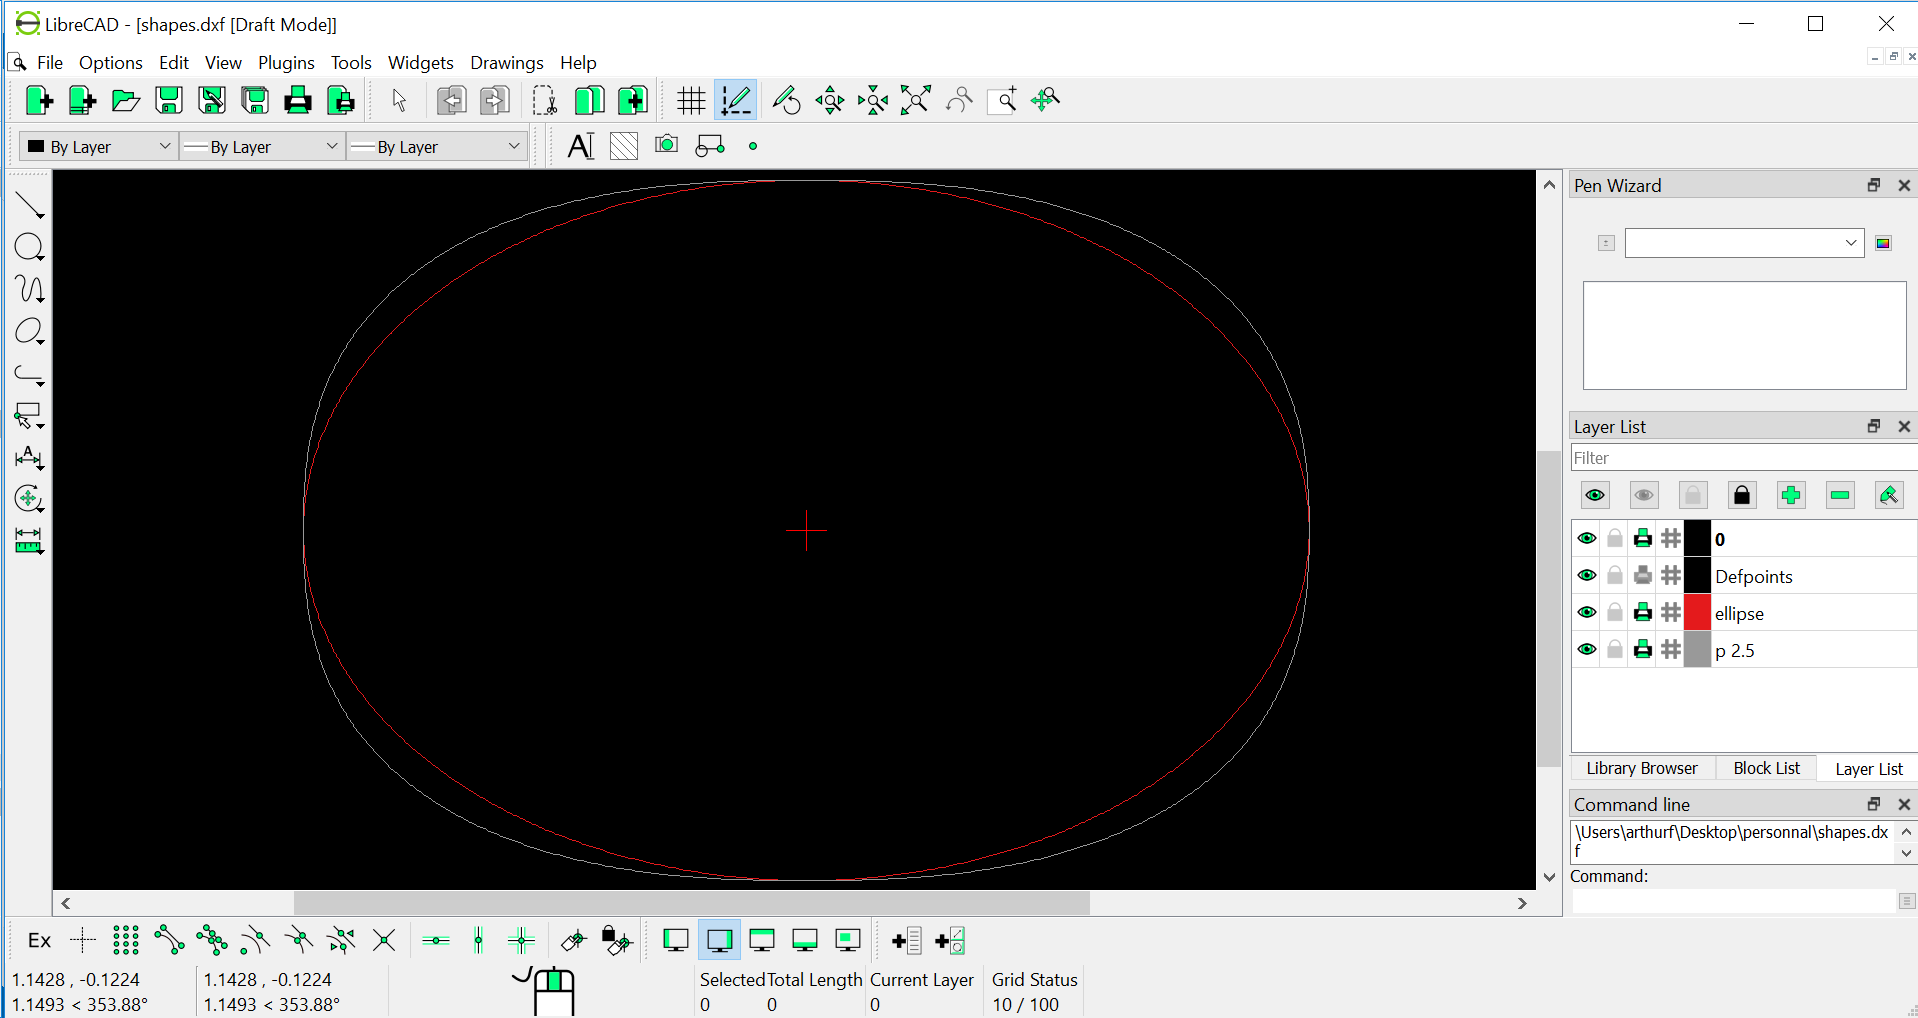
Super-ellipsis (white) and Ellipse (red) in libreCAD.
We could have checked we’re approximating the curve closely enough, but it looked overkill… The real issue we could have faced is that some tools don’t support splines, and require using circular arcs instead… Dealing with this would have required just a little more work.
Final result
While we decided the table legs we wanted, the machinist confirmed it would all work out. Here are some pictures of the tools used:
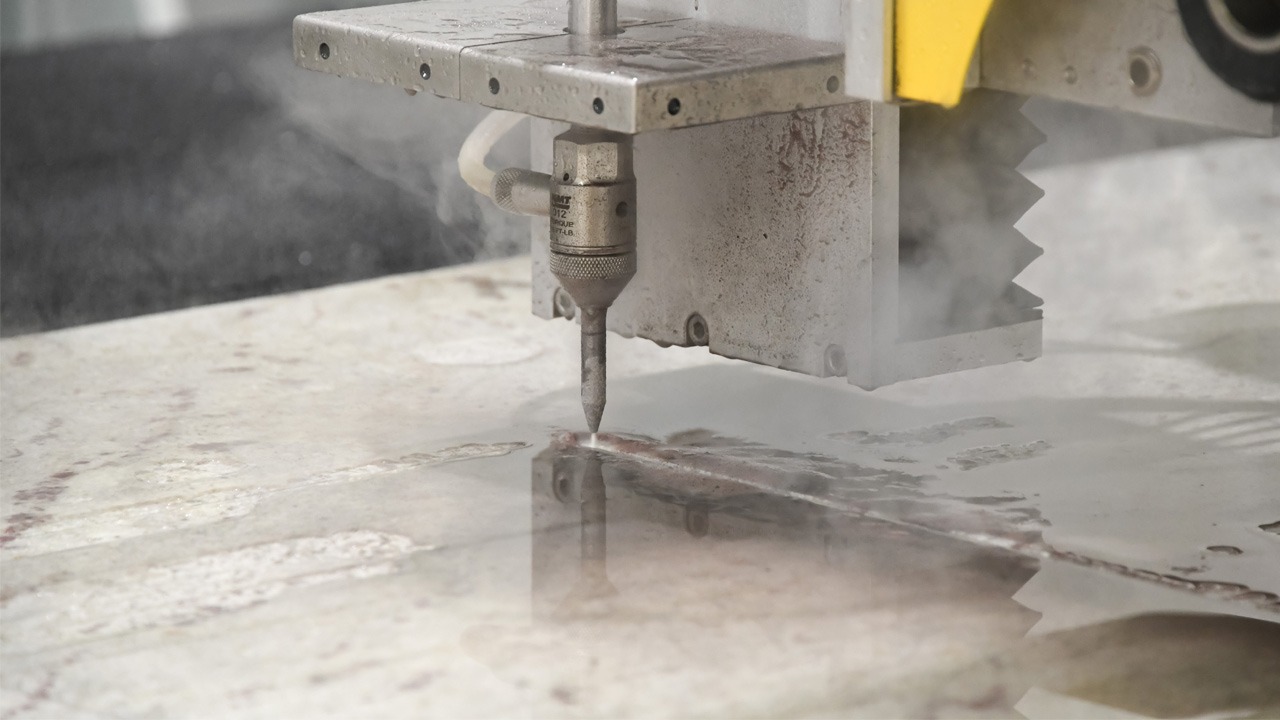
Close-up: Water jet cutter.
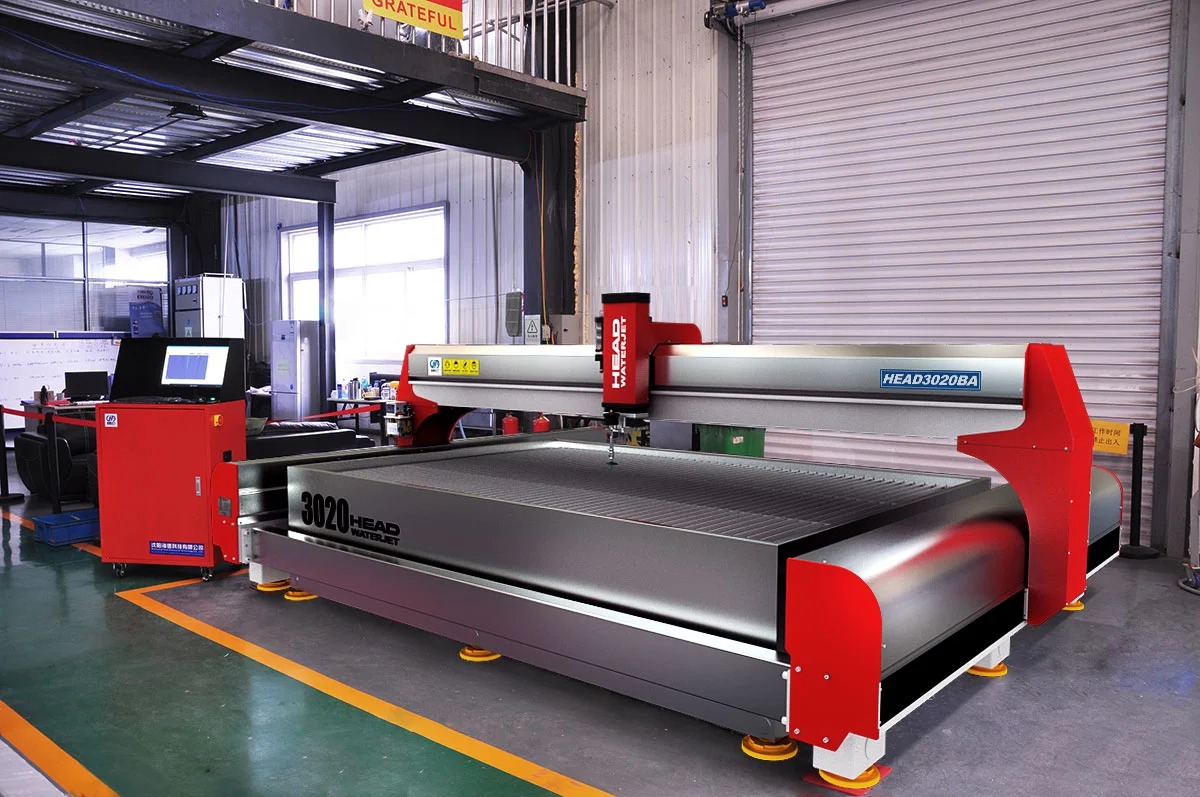
It’s unlikely you can do it at home… (our job was done on an identical machine)
After a couple of weeks the table arrived!
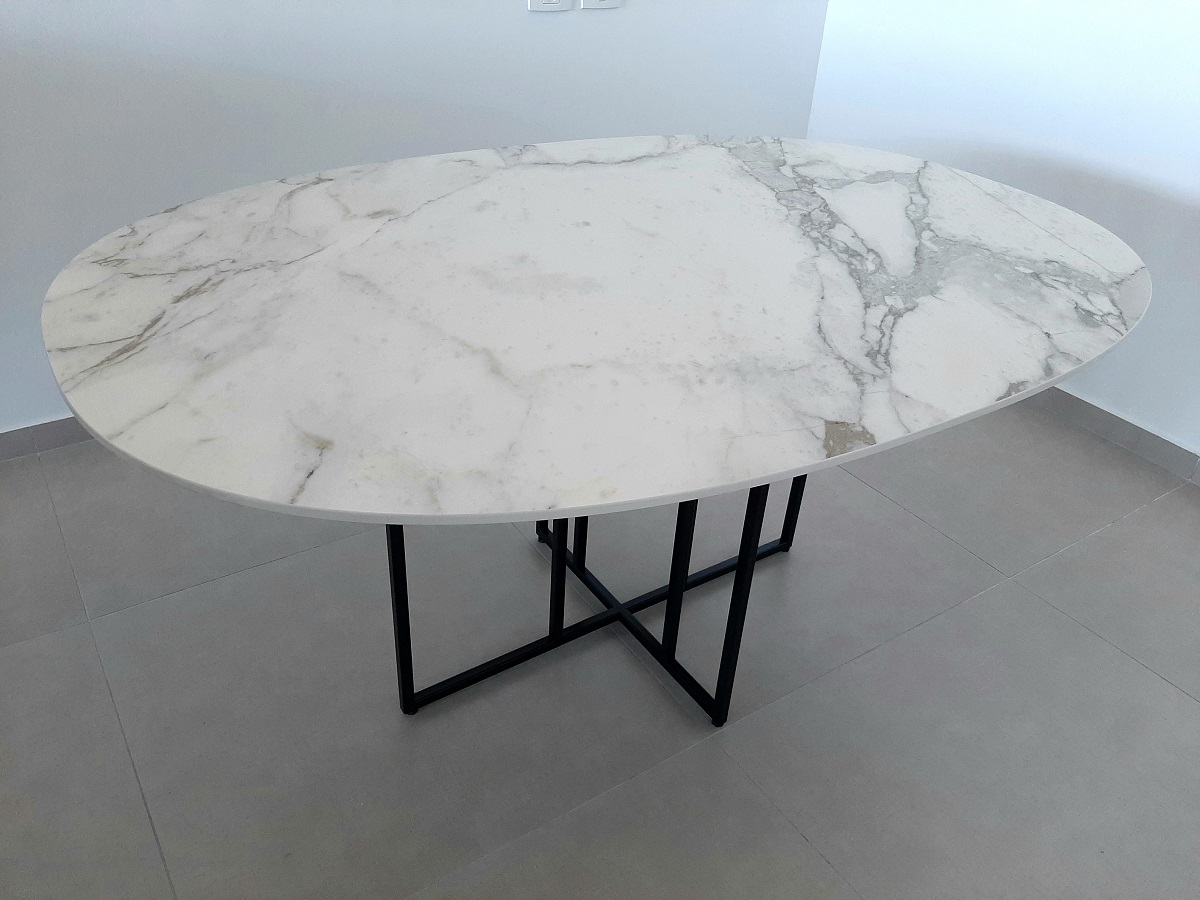
It was really nice working with Yoni from Matab Design (on 3 projects already!). Check out their instagram if you liked the article!